Tuesday, March 17, 2015

A Buffet Table/Sideboard for Our Dining Room


After selling our last dining room buffet table, I was quickly on the hunt for a new one. I searched many thrift stores and even CL and couldn't find anything that would work for the space. This was a bit of a surprise because I usually can find something that would work that I can redo, but nothing was coming up. Maybe it was the cold weather we had been having so many people weren't trying to get rid of dressers or buffet tables. I don't know, but after much searching and wanting to get a new piece for the dining room I decided to look online for some inspiration. I noticed that one of my favorite bloggers, Dear Lillie, made her own sideboard and used plans from Ana White- a great resource for instructions on how to build your own furniture if you so choose.

My hubby had to help me with some of the plans because they were a bit complicated and some of the parts didn't make too much sense, but overall, I would recommend going to her site if you want to try your hand at building things. She has a plethora of options to choose from with detailed instructions and pictures. Also, this thing is really sturdy and I am soooo very happy with the way it turned out.

I am also excited about the fact that I can now show off some of our dish ware and other decor...whereas before with a dresser/buffet table, everything was hidden. This is a really great option for people who want something a little bit different and something unique, because, Hey, it is a hand-built piece.

Now on to the plans. First, we got the cuts we needed at Home Depot. I had the guy there cut some of the bigger pieces of wood for me. Since I didn't have a saw at home, I wanted those cuts done already. I used a jig-saw for the rest.


Once you get the pieces you need, you build the front and the back:


Then you fill in the middle:


Next, you build the top:


Attach the top and work on the sides and the X's.


I decided to stain the top and paint the rest.
The top was stained with an Espresso finish mixed with a gray mixed glaze. It was a gamble with the color, because I had never mixed the 2 before, but it turned out so beautiful!


I wanted to try out the piece indoors and paint it inside with a sample of Passive purchased at SW. Passive is a color I have been wanting to try out for a while. It is a pretty shade of gray with a hint of blue and is a nice light airy color. I almost went with it for our downstairs color and stairway.

I also caulked the X's on the sides to keep them in place. Some of the spots needed more than just wood-fill and since it was going to be painted over, caulking did a nice job covering in the gaps.


Some side notes:
I ended up building our buffet table a bit higher than Ana White's and because of that, I took another bloggers advice and decided to build 2 X's on each side instead of the one on each side. I actually think that in doing this, it looks much better and so pretty. Such a sturdy piece and all wood! It's awesome!
I also decided to build the top first and then start on the X's even though Ana White's website tells you to do the opposite. It worked out better to do it the other way around because mine was built to be about 36" high instead of 30" high.

And now for some pictures of the finished piece. I styled it pretty quickly, so things will move around a bit every now and then, but for now, I love this change. 


** Dining room wall color is SW Intellectual Gray. 
Cute little baskets are from Michaels- were on sale.
Water vase- Target
Blue and white vase- gift from a friend
Plates- On sale at Bed, Bath, and Beyond
Blue plates- wedding gifts
Wreath- A.C. Moore

I also have a Facebook page you can check out here.

Thanks for stopping by!

Linking up with:

Friday, March 6, 2015

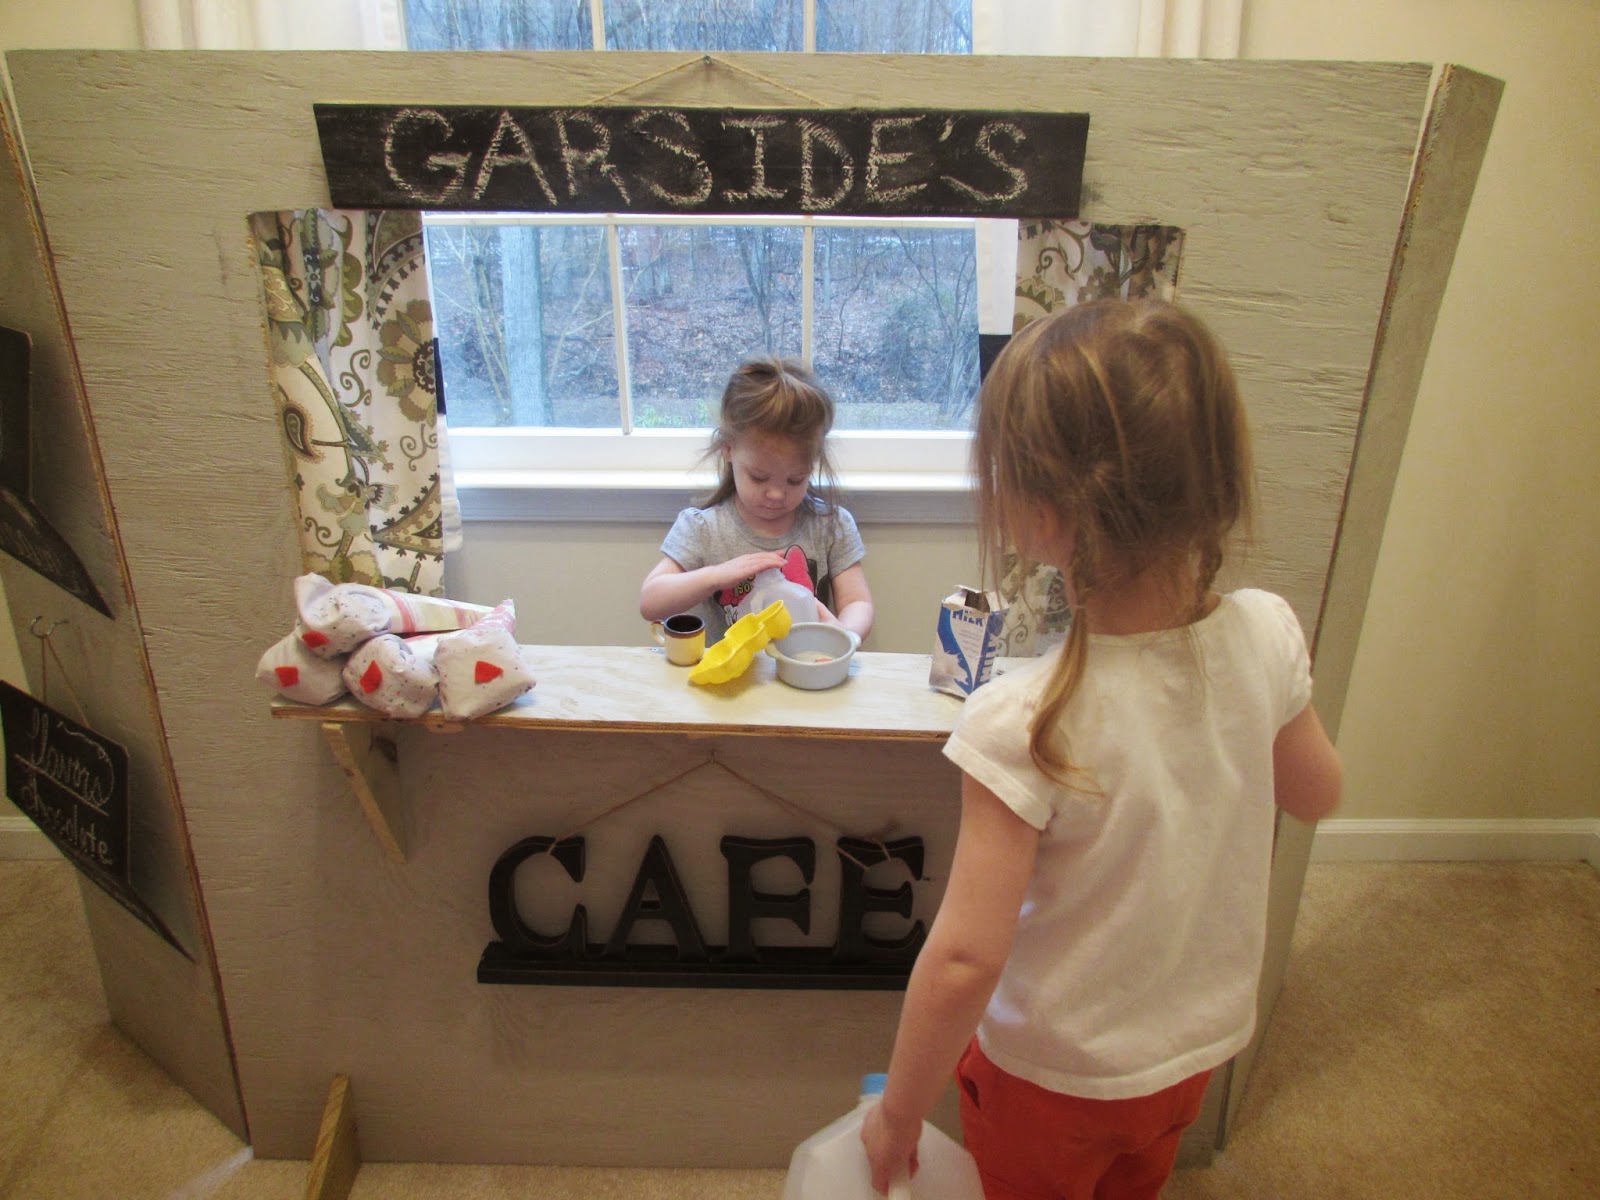
DIY Cafe/Multipurpose Stand


I have enjoyed creating projects for my girls...some they really love and others they quickly lose interest in. This is one of those projects that has given them hours of fun and when their friends come over, they can't get enough of it. 
What is also so great about this project, is that it is multi-functional. It can be a cafe, a puppet theatre, a lemonade stand, a snack stand, etc. Whatever their little minds want it to be. I wish I could say this was an original idea of mine, but it is not. Dear Lillie shared this on her blog and so I gave it a try.


Here is what you will need:

1 piece of wood approximate 4' by 4'
2 pieces of wood approximately 2' by 4'
4 small hinges
a few nails or screws
paint or paint pens to write with
cardboard for signs
some long skinny boards for making signs (and for the little brackets)
fabric for curtains (optional)
2 hooks (optional)
1 tension rod (optional)
 a jigsaw or access to one 


Step One: Get your 3 boards. I purchased mine at Home Depot and had them cut some to size. I kept the leftover wood to make the ledge which you will see later on in this post.

Step 2: Paint each board. I painted them with SW Mindful Gray...this wouldn't be my first choice, but it is what I had on hand.  If you have little helpers, this would be a great time to let them help with the painting process. My little girls loved this part.


Step 3: This is where you will want to use your jigsaw. I just traced out where I wanted the center cut to be made and cut away. 
 This is what it will look like.

Step 4: Use your jigsaw and extra wood to cut a ledge for your center rectangle. 

Step 5: Add some support with some little wood wedges. We had these on hand from a project we completed a year ago so saving pieces like that can sometimes come in handy.
I used a few screws we also had on hand to keep the wedges in place.


 Step 6: Now it is time to add the hinges. I should've only bought one pack, so I ended up returning one since these packs come with 2 hinges already. These are about 1 inch thick which you really want because if you get ones any bigger, you could go through the wood pieces.

I put each one about  one foot down from the top and the bottom.

 Here is how this was looking after these parts were complete.

You could stop here and just leave your "cafe" like so, but I wanted to add more detail and character to it.


 Step 7: I decided to add some feet to the front of the cafe so that it didn't tip. Before I put these in, my youngest actually managed to knock to board forward when she was standing behind it...so it was time to add these. I also used some left over scrap wood for the feet.

Step 8: Add some curtains and a tension rod if you would like. I also created some signs for the girls that they love. I used chalkboard paint so they can easily be changed up for whenever the girls want to play something new. For now, they are loving the cafe. It's their personal restaurant, as they like to say.  :)


I also added some cardboard boxes to the other side of the cafe for extra storage.


And one other thing I love about this project is that because of the hinges, it can be easily transported to places when we travel and want to bring it with us so the girls can use it. We haven't done that yet, but I like that this is an option.

Thanks for stopping by and if you make one of these, let me know what you and your kiddos think of it!!


Monday, March 2, 2015

New Flowers and a Sneak Peek


Over the weekend, we were able to buy some fresh hydrangeas for the house. I am so happy they are starting to go back in season. We bought them at Trader Joe's so if you have one near you, chances are they are carrying them. Since the Farmer's Market hasn't started up here yet, buying these flowers at Trader Joe's seems to be the best way to get them. I couldn't find them anywhere else and really, really wanted some for our home...can't you tell? ;)


Also, I wanted to share a sneak peek of an awesome kid's project I completed over the weekend when we were snowed in. I will share more details later in the week, but here is a glimpse at the fun project your kids will enjoy.


And here are my little helpers helping me paint some of the wood pieces for this project.
They really enjoyed that part too!


I will share more details and pictures later in the week of this.

Thanks for stopping by!