Showing posts with label Ana White. Show all posts

Saturday, July 8, 2017

DIY Doll Bunk Beds

Recently, my oldest daughter wanted to buy a new doll with the money she received for her birthday. A couple of days after her birthday, we set off to Target. It was there in the toy aisle that she picked up a new doll, Maeva. At home, she quickly took her out of her box and excitedly added Maeva to her and her sister's doll collection- so Maeva joined Kendra and Ruby. 

After watching my girls play with these dolls, it became clear to me that their dolls could use a place to "rest" at night since they don't seem to be fans of sleeping with them in their beds. One night, I googled "doll bunk beds" and quickly stumbled upon this one from Ana White. With a price tag of less than $10 to make, it was an obvious choice to build. Head to her site if you want to see this plan and hundreds of others like it. She's a super talented young lady with TONS of diy ideas.

Once the plans were decided, I took a trip to Lowe's with one of my girls. 
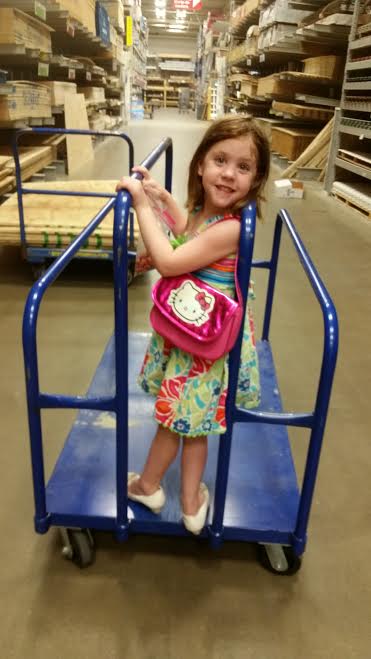
Don't you love the heels with the dress paired with the purse? Best way to shop at a home improvement store, in my opinion. ;)

Sadly, we didn't find all the wood we needed so we decided we would recruit Daddy to help us on our search the next day. :) Daddy to the rescue!!!

Once we got all the wood pieces and dimensions correct, we came home with our supplies and got to work cutting all the wood. Instead of using our table saw for this, I decided it would be easier for me to just use our jig-saw. If you don't have a table saw, you can definitely use a jig-saw for this project- the cuts might not be as straight, but for this project it wasn't a big issue.


Some of the photos are a little grainy- they were taken on my phone at night. My girls were quite the helpers with this project- bringing me the right screws and nails. My oldest even helped with painting the bunk bed (more on that later).


Because Ana White has a pretty detailed post on her site, with pictures and all, I decided not to share all of the required steps here. 
However, I'll be sharing some of the photos of the mostly completed bed.


Once it was built, it was time to add the mattress support. At first I tried using some Styrofoam we had on hand.... 


But that didn't work out all that great. So instead I found some leftover laminate wood boards we had from a bench and put that in. The pictures of that are posted later on.


You could keep these beds unpainted or stain the wood, but we decided to paint ours. 
I went ahead and used this paint color from when I painted the girls bedroom closet doors. 
It's a pretty light pink with a bit of gray mixed in.


My beautiful littler helper even wanted in on the action. ;)


Below is a picture of the board we used to go under the mattresses. You could probably use a variety of any kind of sturdy material for this part. Since we just happened to have these, and they were "free", that's what we went with.


Even though it might not have been necessary, I went ahead and stapled our boards to the bed frames, but you don't have to.


Next, I thought it would be neat to make the doll mattresses and pillows!! This part was FUN!!!


We had an old pillow that I basically tore open and used the foam from it to stuff the fabric. 
Now, I must mention that in NO way am I experienced in sewing, but if you love to sew and that's your jam, I bet you could really create some beautiful pieces for this part. 
I guess what I'm trying to say is...if I can do this, so can you!!


And Ana White also has plans on how to make the mattress and pillows on her site. I'd head on over to her page if you want to see detailed plans. 


Once this was all complete, I placed the bed in our girls' room and when they got up in the morning, they were very excited to see it finished! They played happily with their dolls in their new beds for quite a while. :)


Tess playing with Maeva and Kendra. :)


This last pic was taken the morning after my girls woke up and saw the finished bed for the first time. It was sweet to see them play together like that...even if it's not as often as we'd like. ;)


This was overall a very fun and quick project to do. If you try it out, let me know how it goes!!

Tuesday, March 17, 2015

A Buffet Table/Sideboard for Our Dining Room


After selling our last dining room buffet table, I was quickly on the hunt for a new one. I searched many thrift stores and even CL and couldn't find anything that would work for the space. This was a bit of a surprise because I usually can find something that would work that I can redo, but nothing was coming up. Maybe it was the cold weather we had been having so many people weren't trying to get rid of dressers or buffet tables. I don't know, but after much searching and wanting to get a new piece for the dining room I decided to look online for some inspiration. I noticed that one of my favorite bloggers, Dear Lillie, made her own sideboard and used plans from Ana White- a great resource for instructions on how to build your own furniture if you so choose.

My hubby had to help me with some of the plans because they were a bit complicated and some of the parts didn't make too much sense, but overall, I would recommend going to her site if you want to try your hand at building things. She has a plethora of options to choose from with detailed instructions and pictures. Also, this thing is really sturdy and I am soooo very happy with the way it turned out.

I am also excited about the fact that I can now show off some of our dish ware and other decor...whereas before with a dresser/buffet table, everything was hidden. This is a really great option for people who want something a little bit different and something unique, because, Hey, it is a hand-built piece.

Now on to the plans. First, we got the cuts we needed at Home Depot. I had the guy there cut some of the bigger pieces of wood for me. Since I didn't have a saw at home, I wanted those cuts done already. I used a jig-saw for the rest.


Once you get the pieces you need, you build the front and the back:


Then you fill in the middle:


Next, you build the top:


Attach the top and work on the sides and the X's.


I decided to stain the top and paint the rest.
The top was stained with an Espresso finish mixed with a gray mixed glaze. It was a gamble with the color, because I had never mixed the 2 before, but it turned out so beautiful!


I wanted to try out the piece indoors and paint it inside with a sample of Passive purchased at SW. Passive is a color I have been wanting to try out for a while. It is a pretty shade of gray with a hint of blue and is a nice light airy color. I almost went with it for our downstairs color and stairway.

I also caulked the X's on the sides to keep them in place. Some of the spots needed more than just wood-fill and since it was going to be painted over, caulking did a nice job covering in the gaps.


Some side notes:
I ended up building our buffet table a bit higher than Ana White's and because of that, I took another bloggers advice and decided to build 2 X's on each side instead of the one on each side. I actually think that in doing this, it looks much better and so pretty. Such a sturdy piece and all wood! It's awesome!
I also decided to build the top first and then start on the X's even though Ana White's website tells you to do the opposite. It worked out better to do it the other way around because mine was built to be about 36" high instead of 30" high.

And now for some pictures of the finished piece. I styled it pretty quickly, so things will move around a bit every now and then, but for now, I love this change. 


** Dining room wall color is SW Intellectual Gray. 
Cute little baskets are from Michaels- were on sale.
Water vase- Target
Blue and white vase- gift from a friend
Plates- On sale at Bed, Bath, and Beyond
Blue plates- wedding gifts
Wreath- A.C. Moore

I also have a Facebook page you can check out here.

Thanks for stopping by!

Linking up with: