Friday, October 26, 2012

A Hymn of Inspiration

 
Happy Friday everyone!
I wanted to post today about a hymn that we use to sing in our church back in Florida that has been a great inspiration to my husband and I and it's one of my favorite hymns to sing. Hopefully the church we attend now, which is not in Florida, will sing a hymn someday soon on Sunday. :)
 
 
1. Come, thou Fount of every blessing,
tune my heart to sing thy grace;

streams of mercy, never ceasing,
call for songs of loudest praise.

Teach me some melodious sonnet,
sung by flaming tongues above.
Praise the mount! I'm fixed upon it,
mount of thy redeeming love.

2. Here I raise mine Ebenezer;
hither by thy help I'm come;
and I hope, by thy good pleasure,
safely to arrive at home.
Jesus sought me when a stranger,
wandering from the fold of God;
he, to rescue me from danger,
interposed his precious blood.

3. O to grace how great a debtor
daily I'm constrained to be!
Let thy goodness, like a fetter,
bind my wandering heart to thee.
Prone to wander, Lord, I feel it,
prone to leave the God I love;
here's my heart, O take and seal it,
seal it for thy courts above.
 
 
And if you have never heard of this song before or are unfamiliar with the tune, here is a great link that plays the tune for you. :)
 
 
Have a great weekend everyone and thanks for stopping by!


Wednesday, October 24, 2012

Painting Armchairs!

Yep! You read my title correctly! :)
I painted our armchairs this weekend and have a few pictures to show you of the progress I made along the way.
I still have to upload more pictures of the family room as it stands with the newly painted armchairs, but that will be for tomorrow's post hopefully.
Let's begin, shall we?!
To start this project, I did a little research on exactly how you should go about painting a piece of furniture fabric like an armchair. There are many great resources out there, but the two that I used came from this lovely blog by Hyphen Interiors and this awesome blog by I Should Be Mopping the Floors.
So I went out and purchased some paint, a lovely color called Wrought Iron by Martha Stewart, a mixing container, a water bottle, and some Fabric Medium all from Home Depot. The total came in under $15.
I used 4 bottles of Fabric Medium...one note though: I could have probably used 3 bottles but I didn't water down the chairs the first go around like I should have so I needed the 4th bottle by the end.

Then I snapped some pictures of what one of the chairs looked like with the slipcover I made and the other chair without the slipcover.

Don't the original armchairs look fabulous?
Nope!! Not really...but it was $25 at the Restore and I knew I could do something with it...plus, we had been wanting 2 armchairs like these for our large family room and I couldn't pass up the $25 price tag!!!!!
:)
I love thrifting!!


Okay, so after I took off the slipcovers and cleaned up the armchairs a bit, I used my Home Depot water bottle to spray down the chairs.
I used a ton of water because you want to be generous with that part. I probably should have used more the first go around, like I mentioned before, but you live and you learn I guess.


Look at those lovely marks!
Anyways, this was a picture I took after the first coat went on.
I did 2 more coats after the first dried.


Then I came back after I let the paint dry to do a second coat on both of the chairs.
I watered down the chairs each time I painted.


Here is what she looks like after a 3rd coat of paint...doesn't look that great yet because the paint and the fabric medium had to dry first, but don't worry...I have more pictures to share with you tomorrow.


And a quick side-by-side shot of the armchairs from Before and After.

I should also mention that once these puppies dried, after 24-48 hours, they needed to be ironed a bit so the paint set...I still have yet to do that step because I just couldn't wait to get them inside to see how they looked in our family room. However, they were dry enough to sit in when I brought them inside....we already tested that out!!

And the chairs don't feel stiff from the paint either!
Why??
Because when you mix the fabric medium with the paint, the fabric medium keeps the paint on the chair from getting too stiff.
Amazing!!


Oh, and in case you were wondering, the blogs I read said to mix a 1:1 ratio of the paint and the fabric medium...plus, a half part of water before you begin painting.
I followed the directions on the fabric medium bottle and did about a 2:1 ratio of the paint and fabric medium with half the amount of water of the medium. For me, that worked best, but I don't think it matters too much. It may depend on the type of fabric you are painting.

Stay tuned for more pictures of the complete look and I will show you what these beauties look like in our room!!

I'd love to know if you have ever done something like this before too?!

The DedicatedHouse

Thanks for stopping by!


Family Room with Navy Armchairs

 
Hello all and good morning!
I hope you are having a great start to the day. :)
 
I am back to show you some pictures I took and uploaded of the new room we have been rearranging.
So many things have been added to this room...not necessarily purchased, but just moved around from other parts of our house.
It's kind of fun shopping around your house for things to put in other rooms...especially if they fit better in the new place you put them.
 
So here are some of the pictures I promised to share of our room!!
 
 
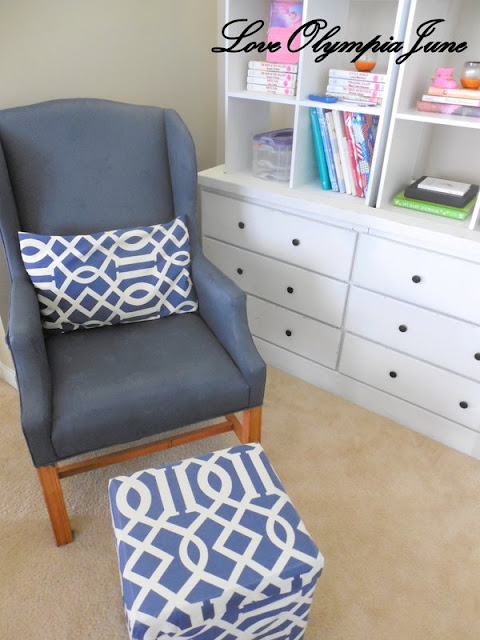
Here is one pictures of our navy armchairs...remember I shared about painting these here....


The blue fabric I bought online in the summer from Fabric.com and love how it looks paired with our navy armchair. :)

 
Here is the other navy armchair with a navy striped pillow I made out of fabric I also bought online at Fabric.com....great website to check out for a variety of fabric if you are interested.


I know...the TV needs to be cleaned again...I think what happened is I used a multi-purpose surface cleaner instead of the glass cleaner which was a big mistake...hehe. It can be fixed thankfully so I don't have to look at it like that. ;)
 
Anyways, do you love the new color combination we have going on?
 
 
Thanks for stopping by folks!


Monday, October 22, 2012

From Dresser to Bookshelves!

 
Happy Monday everyone!
I hope you had a great weekend.
My family and I spent most of the weekend hanging out together with friends, running errands and cleaning up the house. The last 2 don't sound that fun but it kind of was because I got to work on some more projects I had been thinking about. :) We invited some friends over so their son and our daughter could have a play date before bed time...then we, the adults, played some board games and munched on yummy snacks and desserts. We seriously would love to do that every week if we could!

Well, on to some of the DIY projects I completed this weekend...
 
To start, my husband and I hit up the local Thrift Store on Saturday with our daugther and found a beautiful piece of furniture for our dining room....sorry, no pics of that today but they will come, I promise! I just wanted to share that with you all because we moved our old table from the dining room to our family room and needed a buffet table...
 
Anyways, you might remember that I made over a dresser and used that as our buffet table in the dining room- check it out here! WELL.....I changed things up again...yep, once AGAIN, and had a new plan. This dresser has been changed around like 3 times already and each time I fall more in love with the transformation!
 
The plan was to move the dresser/buffet table to the family room and use it as a bookshelf (more on that soon) and put our new buffet table, which we purchased at the Thrift Store, into our dining room.
Our new buffet table really is a beautiful piece and I can't wait to upload the pictures of it to show on the blog.
Okay, so today I have pictures to share of how we paired our old buffet table with our Target bookshelves to make one big bookshelf piece for our family room.
 
To explain better, I have some pictures for ya.  :)
 
 
So here are the Target shelves in our family room by the fireplace.
For a week these stayed here until I could figure out what to do with them.

 
Then it hit me! I could use the old dresser we had in our dining room and move it to the family room.
Then, I put the Target shelves on top of our dresser and BOOM! we had the bookshelves I had been dreaming of. And we didn't have to buy anything to make them! We just shuffled some pieces we already had in our house around a bit.
And I guess I should clarify that my hubby helped with most of this because there was no way I was moving all of this stuff around by myself!  :)

 
Once I figured out that this was what I wanted, we started putting in the dresser shelves to complete the look a little more and I have to say that I love our new shelves!!!!!!
 
Like LOVE, LOVE them!!

 
I still have plans of placing a backing up on the back of the shelves and possibly paint that a navy color.
I am also working on a DIY project for our armchairs involving the color navy and will share that this week too!
 
You can see one of our armchairs in the picture above...and my plan for these armchairs involves paint (in the color navy) and removing the slipcovers. I am a little sad to see my hand-made slipcovers go, but I will keep them on hand just in case I want to use them again in the future. ;)

 
And we changed up the fireplace a little bit too.
With the birthday money I received from my parents, I decided to by a bronzed circular mirror I had been eyeing from Home Depot a few months back.

 
And here is a picture of the shelves and our new fireplace mirror together.  :)
 
So what do you think about the room coming together like this?
Do you love it as much as my family and I do?
 
Skip To My Lou
mop it up mondays MakeitPrettyMonday
  Home Stories A2ZMy Uncommon Slice of Suburbia
 
Have a great start to the week, everybody and thanks for stopping by!


Friday, October 19, 2012

Bible Devotions

 
Good morning and happy Friday!
 
:)
 
 Today will be a short and sweet post about the Word.
In times of joy and in times of uncertainty, it is always wonderful to know that the Lord is with me always like he says he is in his Word.

He says, “Be still, and know that I am God;
I will be exalted among the nations,
I will be exalted in the earth.”

Psalm 46:10

In the times of quiet I have every now and then, I can hear Him saying that to me and those words are comforting. I pray that I will always place my trust in the Lord and know that He is God!

I hope you all have a fantastic Friday and a weekend full of His grace.

Thanks for stopping by!!


Thursday, October 18, 2012

Dollar Tree Centerpieces

 
Hi there and I'm back again to post about my centerpieces. :)
If you read yesterday's blog about my DIY project on how to make these centerpieces, you will see how I made these. It's pretty easy and saved a ton of money so I'm pretty excited.
So today I just wanted to show you how I filled my centerpieces.
 
 
I filled the vases with flowers I bought from Wal-Mart last year and with some leaves from our yard.


And I wanted to post this picture again because I love it so much!!  <3

 
How do you decorate your table?
 
 
Thanks for stopping by!


Wednesday, October 17, 2012

DIY Centerpiece Project

Well Hello, Hello!!!
I hope you all are having a great Wednesday. :)
 
Yesterday evening, my husband and I had a game night with our Bible study group and it sure was fun! We got together to socialize, fellowship, eat, and play games and it was a good time to just relax and laugh together. I love those moments and really look forward to them. It's great to see how the Lord blesses us with the people He puts in our lives and we are always excited to see what good things He brings to us.
 
Also...today I wanted to share a project with you that is super quick, easy, and cheap!
All the materials I needed for this project I either had or bought from the Dollar Store! Yeah!!
 
 
So I will start by showing some pictures and explaining what I did.
I also should quickly mention that this idea came from looking at a blog called 320Sycamore and this stay-at-home mom is super talented. :)


The two vases I already had and saved them from our wedding about 4 years ago. These vases each cost a dollar when I purchased them back in the day from the Dollar Store.
They had to be cleaned so I did that after I completed this project.

 
The candlesticks and the 2 pumpkin candles came from the Dollar Store for a total of $4.00 plus tax.
Can you see where I am going with all of these?

 
I glued the candlesticks to the bottom of my vases using a glue called Loctite because hot glue didn't work well and the plan was to place the candles inside the vases.
Can you say, "SIMPLE!!"?

 
And after they were glued and cleaned, I placed them on our table as a centerpiece.
The pumpkin is from a local pumpkin patch we went to a few weeks ago and the salt and pepper shakers were sent up from my mom for my birthday. :)

 
I decided not to place the pumpkin spice candles into the vases and instead, moved them to the fireplace.

 
I think they look much better on our fireplace mantle. :)

 
And there you have it!
A quick and easy, and CHEAP, way to make your own centerpieces just by using what you have with a little something extra from the Dollar Tree!!!!!
 
Yay for saving money!
 
Oh, and I should mention that 320 Sycamore's blog said that these vases cost anywhere from $60 to $170 if you buy them at Willams Sonoma! I just looked it up too and she was right!
Crazy ridiculous, huh??
 
Do you think you will make something like this?
 
 
Thanks for stopping by!


Monday, October 15, 2012

More Pictures Around the House


Good morning and happy Monday, everyone!
Today is my birthday so this post will be short and sweet. :)
I am celebrating my big day with my family and have already started this weekend by opening some presents! :) One of which was a new camera from my husband and I love it. It also can take lots of video which is something I had been wanting for a few months now and can finally do it. Yay!!
 
Well, with my new snazzy camera, I took a few more pictures around our house and will upload them to show you.
Enjoy!


And there you have it...another little quick tour of a part of our home that is always a work in progress.
 
 
Thanks for stopping by! :)
 

Friday, October 12, 2012

TV Cords Tucked Away For Now

 
Ever wonder what to do with your TV cords? Well, we had that problem a few weeks ago and it is no longer a problem anymore! Yay!!
On Wednesdays blog post, I wrote about how we were going to hide our television cord since we moved our TV to a different part of our family room. We purchased some electrical tape at Home Depot and after wrapping the tape around our cord, we were able to use some special nails to tap these puppies into the wall so they stay secure. Thankfully, we didn't have to buy much for this project...all we bought was the electrical tape and we had everything else on hand! Gotta love that!


So in these pictures you can see the cover and the nail that goes over the cord and keeps it in place on the wall.


So, it isn't a perfect solution, but it was the best one for us and really, even though it is hard to tell in this picture, the cord is right up to the mantle and is out of the way for the most part.

 
This is the other side of the mantle and it is so much better than having cords hanging out everywhere.
 
In the picture below, you can see what we started with.
It was quite the mess!
I am glad we were able to find a solution to get this television cord out of the way.

 
Eek! Hard to look at that picture above!
 
 
So how do you hide your television cords if you have to?
 
 
Thanks for stopping by and have a happy Friday!!
 
For I know the plans I have for you," declares the LORD, "plans to prosper you and not to harm you, plans to give you hope and a future.
Jeremiah 29:11