Showing posts with label Laundry Room. Show all posts

Friday, March 16, 2018

Shoe Storage for the Laundry Room (and inexpensive too)

Hi there!

After my last post about our daughter's birthday party, I wasn't sure what I would blog about next. A lot of the spaces in our home are "done" and I don't have any big reveals planned. I do have a few ideas of posts for the future of little projects, but after over 3 years of living in our home, there won't be any huge reveals (unless we hit the lottery or something...haha).  

However, today I do want to share a good shoe storage option we recently have been using in our laundry room.

To really appreciate the organization, I'll share what we were using as shoe storage before all this.


Yikes!!
Our old cube storage was clearly not functional anymore (it had been a good 7 year run) and was breaking in a few spots. 
I originally thought I would just get another one and ended up buying Target's Room Essential storage brand, thinking we would use it. BUT...


then my oldest daughter and I, one afternoon after dance class, ran some errands at Wal-Mart next door. We decided to peruse the storage section and stumbled upon their Better Homes and Garden line. Now, I don't know about you, but I have actually been pretty impressed with their stuff. We've bought a few home items from that line and once I saw their shoe storage options, I thought we'd give it a try.


Good bye old broken shoe storage!!


We ended up buying 2 of these BH&G's boxes for 3 reasons:

1. We wanted plenty of storage for our shoes (preferably more than what we had before)
2. They are stackable which gives added height to this space and more cubbies to place our shoes. 
3. The price ($20 each)

Even in buying two of these guys, we saved $20 over Target's cubbies, so I ended up returning that one.


Our laundry room is now looking a bit more organized!


Our girls boots even fit in the cubbies which ended up being an added bonus! 

So I'd say if you are on the hunt for some shoe storage that not only looks nice but it pretty inexpensive, take a look at BH&G's selection at Wal-Mart. It won't disappoint! 

FYI- in no way am I being paid by Wal-Mart for this post. I just wanted to happily share an inexpensive option for shoe storage. :)

Wednesday, February 1, 2017

Stenciling in the Laundry Room- An Inexpensive DIY Project

Tackling our laundry room was one of the first projects that we completed shortly after moving into our home a few years ago...removing the upper cabinets in our kitchen was one of the firsts.
The laundry room was one of those spaces that still had wallpaper leftover from the previous owners, so my husband and I removed it before we painted. (For the record, removing wallpaper is not a fun process! But I am glad we did it!!)

Once the wallpaper was removed, I painted the room with SW Pavestone- a gray that doesn't really have a strong undertone. I have always felt that since our laundry room doesn't get much light, the space just looked a little too dark with the gray walls and I wanted to lighten things up a bit in there. Needless to say, 2 years passed and I hadn't done anything. 
It wasn't until recently that I decided to go ahead and lighten up the space by painting the lower portion of the walls with a pretty white, SW Alabaster, and adding a stencil to the rest of the walls. It made such a difference!

So to backtrack a bit, here is how the room looked with SW Pavestone everywhere:


It wasn't bad at all, but with one little window, it felt too dark.

Since I knew I wanted to stencil part of the walls, I searched online for a few ideas and landed on this trellis pattern pictured below. It ties in with our rug and some fabric we have on our pillows.


I had my husband print out a template and then traced it onto some cardboard we had leftover from a food box. ;) 
Stenciling did take quite a while- I ended up spreading that part out over weekend and am glad my husband told me not to stencil the entire space!! That would've taken forever and would've been an unpleasant process. Oh, and I used a Sharpie marker pen that apparently I have had for several years- just totally forgot about it until I searched the house for one! Ha!

Here is a quick run down of the supplies used for this project:
Stencil and template
Sharpie marker pen
Gallon of SW Alabaster and paint brush
Ruler
Leveler
Trim and nails   

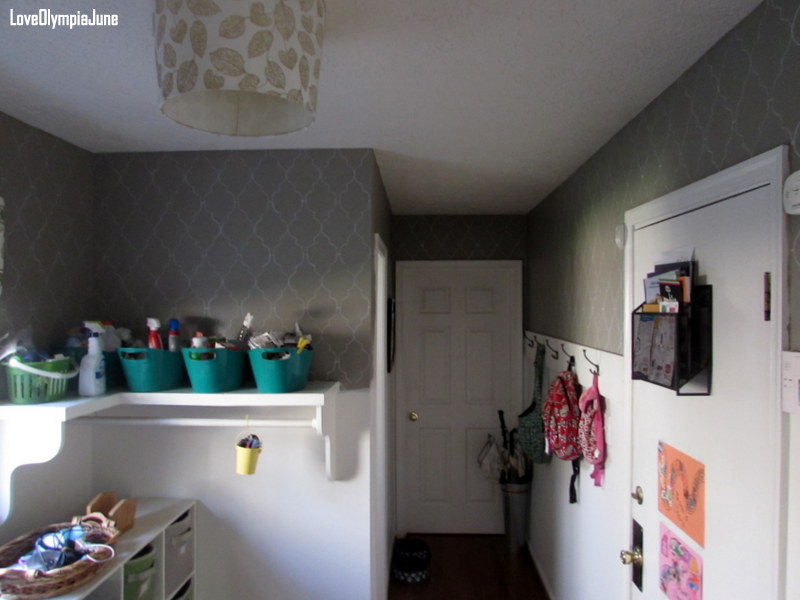
I didn't take any pictures of the stenciling and painting process, unfortunately, but here are some afters once it was all finished.


Much lighter and brighter AND much more visually appealing!
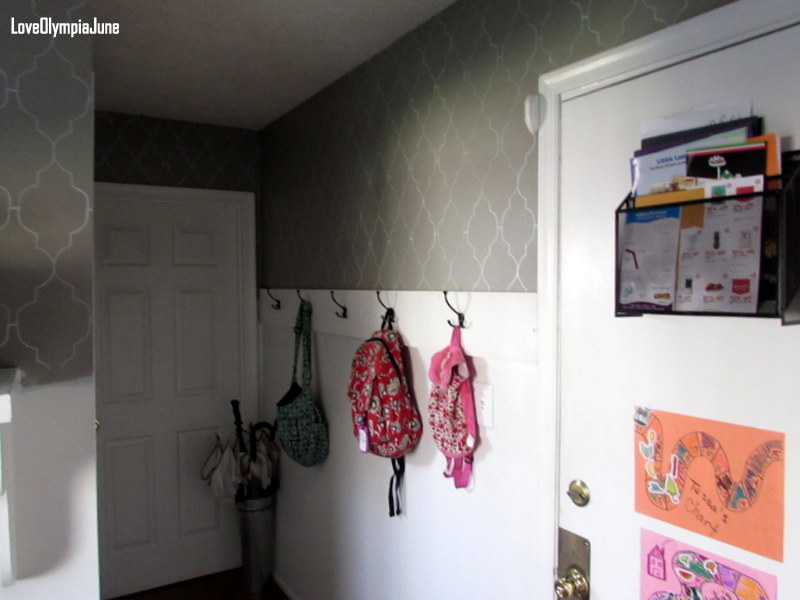
We LOVED it...but it still wasn't quite finished just yet. In order to separate the two parts of the upper and lower walls, I wanted to add some sort of inexpensive trim around the room. I ended up buying a very inexpensive 8' board (total cost was $1.40) to do the job and nailed it up to the wall.


My oldest wanted to help add the trim so she got to hammer a few nails on. :)


Such a good little helper!!


And here are a few photos after all the trim was installed and painted:


The pattern is subtle, but still noticeable and the space feels much more lighter! :)
And one of the best parts about this project (aside from working with my girl which was at the top!!) was that the total cost for the paint and trim was about $30. 

Have you ever worked with a stencil? How did it turn out?