Like the title states, this is my first post of the new year- 2016!
I said it in my last post and I'll say it again, I can't believe another new year is upon us. And how is it that it is already the 5th of January?! Doesn't it seem like yesterday it was Christmas??
As I was thinking about what to write for my first post in the new year (a lot of pressure, I know), I came upon some pictures of our current home when we first moved in just a little over a year ago. I wanted to re-post some of them again because I have already forgotten what things looked like around here since the move. My husband and I have been able to make some changes with the house, some big and some small, and are very pleased at how things have been coming along so far. It's really, really starting to feel like our home and not someone else's and it was fun to look back on some of the older photos of the place and compare them to how things look now.
First up, the family room!
To recap, we have since replaced the green carpet, painted the trim and the walls, painted the fan white (yes, you read that correctly!) and rearranged some furniture around. The only major cost in this room was replacing the carpet for a cleaner/updated one. Everything else was updated with paint pretty much.
Next up is the glorious kitchen.
(It really looks like a hoarders house with all the boxes and stuff piled onto the counters- just ignore all that). These photos were literally taken right after we moved in, obviously. ;)
And
yes, we still own that lovely fridge and stove...when we can save a
little bit more, we would like to update those as well. The current ones
you see pictured are about 25 years old... and no, I am not making that
up!
For this area, I painted the cabinets, island, trim, and walls. I also painted the fridge, of course.
We
replaced the ceiling fan with a light fixture and also replaced the
80's table light with a Restore light fixture. We also added a thrift
store table and chairs that I was able to refinish.
The dining room is next up on the tour!
There weren't any major changes to this space, just small ones that made a big impact.
The
walls and trim were painted. I added bead board wallpaper to the bottom
half of the walls (that stuff is pretty awesome and inexpensive...fyi)
We traded the older curtains and blinds for some simple white curtains.
I
was able to paint the chandelier- there was nothing wrong with it and I
thought it looked pretty in here, so it just got updated with some
paint and glaze.
And of course, we added our signature buffet table in here as well as an IKEA storage piece for coffee.
The rails on our stairs were painted and so was some of the trim.
The next room (pictured below) is now the nursery.
We were able to remove the window valance and added curtains. Originally, I wanted to keep the valance, but because of the shape, it was just really hard to recover.
This room hasn't been painted yet. I'm still decided on whether or not to do that. Haven't found a paint color that would work in here yet- but the original wall color works for now.
Next to the nursery is this little room that is now the reading room that houses all the kiddos' books (it's pictured below).
We added some rain gutter shelves to the wall opposite the window and also took down the valance in here. The girl's lemonade stand got moved up here and we also added a storage bench we made to keep books and art supplies.
That's pretty much it for this space!
I threw this picture in here because my daughter was walking her doll up the stairs and thought that was so cute! Just looking at this picture reminds me of how much she has grown in the past year!!
And this last room is the office. Wallpaper is still up and no real attempts have been made to remove it. :) That would be a project to tackle for another day- far, far away in the future!
The valance has been taken down and a desk has been moved into here...but that is about it!
The room has a door and stays closed most of the time (mainly so I don't have to stare at the ducks and stripes when I walk by)
Hoping to type up a post soon with more "before and after" photos. That way you can see the changes that we have made since the move.
Overall, I'm happy with what we have been able to accomplish since moving into this house. Can't wait to see what kind of things we can get done this year!
Here's to another good year!!
One piece of furniture we bought at a thrift store a couple of years ago was a wooden buffet table.
It was in GREAT shape...but a little outdated.
I can't find a picture of what it looked like when we bought, but it was just all made out of wood.
I love natural wood furniture pieces, but this kind didn't go with our decor and so I wanted to paint it.
I first started by priming the piece, which was not all that fun because of the intricate details on the front doors. Needless to say, it took some time and patience.
After that was done, the buffet table was ready for some paint.
I chose Nuance, by Sherwin Williams.
I love this color- it's a great off-white with just a hint of gray.
After painting, it was time to style...my favorite part!
This piece is no longer available to buy, but we are on the hunt for another one soon! :)
Some tips for styling a buffet table/sideboard:
1. Lamps are a great accessory and provide extra lighting. I chose a green base lamp from Target since green is one of my favorite colors.
2. Layer mirrors together- seems to be a timeless design trick and it looks beautiful.
3. Don't be afraid to add some contrast above your buffet table with a printed pattern or paint- especially if your piece is a neutral color like mine.
4. Add a few more accessories of your liking to personalize.
And that's all!
I hope you enjoyed this post.
Thanks for stopping by!
**Don't forget to like my new Facebook page
https://www.facebook.com/LoveOlympiaJune2014
Well, I finally got some pictures together for a tour of our home.
I have some photos of our entryway, sitting nook, and dining room.
I plan on getting the rest of our home photographed once I have more time, but this week, I was going to share these 3 spaces.
I went with neutral colors throughout our home because it's what we love. Mixes of grays, beige, green, and blue happen to be some of our favorite colors...so incorporating them into our home was something I knew we could do.
Here are some of the photos I took recently of our home...we will start with just a few pictures of our entryway.
Since we don't have a coat closet, I built this coat rack using some wood from the Home Depot and added 3 coat hooks. It keeps our jackets/coats, hats, sweaters, etc handy for when we need them.
Next to our coat rack, we have a dresser for shoes and keys, etc.
I made the frame for the picture above the storage dresser with some wood that I stained.
I had the picture blown up for cheap at Staples.
Next, we move on to the sitting area.
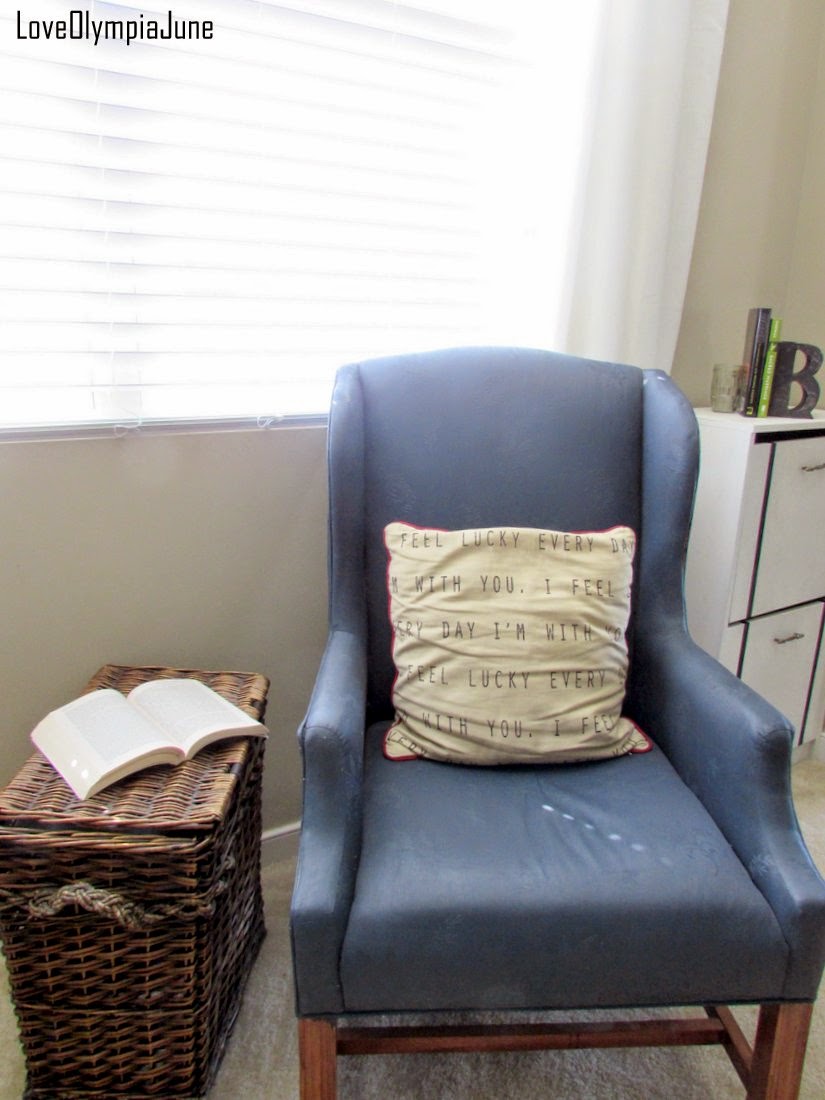
This is a great place not only for some reading, but we also use it as a place to put our shoes on. :)
It's very functional.
And next to the painted blue chair is another shoe storage cabinet from IKEA that I bought a while back and painted and added hardware to.
Our dining room is next up on the tour....
I still feel like this space could use a bit more color...maybe on the buffet table....but for now, it's going to stay this way. ;)
The curtains were painted to give a bit more color and add some drama to the room.
The bench was upholstered in a green fabric that I absolutely love! The fabric is also an indoor/outdoor fabric and has held up to many spills and stains...love that!
I also added a black and white print to the wall above the buffet table. It adds some eye candy to an otherwise blank wall with mirrors.
I have more pictures to come this week so stay tuned!
Have a wonderful Monday everyone!
Ok, so I am back today with some entryway photos like promised!
I took just a couple since our entryway is not that big, but the punches of green with the gray and khaki walls helps to keep it updated and purty!
Here are some photos!
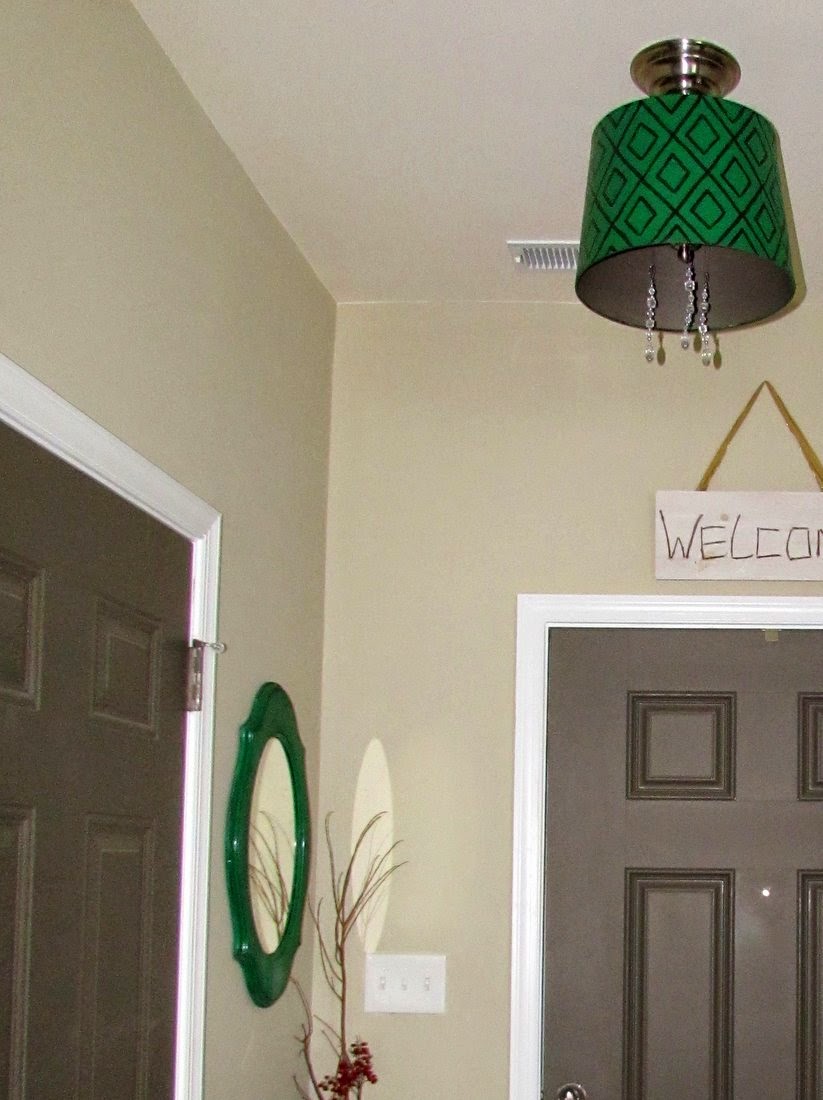
The mirror and the lamp shade (a Target clearance) I painted in Sherwin Williams beautiful green color called LeapFrog. It's a nice shade of green and it works great with the wall color and the door color. :)
I added some fresh greenery from outside (I love doing that!) to the shoe center area.
We also have a gray box by the entryway for little things like kid's sunglasses and spare change.
Our umbrella holder was a thrift store purchase back in the day and it is holding up great! I recovered it in some twine I bought from the Home Depot.
That about does it for the entryway tour...it may be small, but it doesn't lack in storage and style!
Thanks for stopping by!
A few months ago I shared our new entryway light that I made for less than $10 - which includes supplies.
I loved how it turned out, but I thought the bold dark green was a bit too dark for our house and didn't flow well from one room to another.
So I went with a lighter green I had on hand- it was the same green that I used on this thrift store desk.
I love it- it's a pretty medium-toned green from Sherwin Williams and so I just went with it for our light....I liked it so much that I even used it on our entryway mirror.
I haven't taken all of the pictures of it yet, but when I do I will edit the photos and post them this week.
So stay tuned for pictures coming of our entryway- AGAIN. ;)
Oh, and here is a quick photo of the paint color I used on the lamp shade and the mirror:

Have a great Tuesday and thanks for stopping by!
Happy Friday!!
Woot woot!
We have a fun weekend ahead of us...
we have dinner plans with some families tonight and on Easter Sunday we are headed to another families home for lunch. It should be fun. :)
I am back today to share with you about one of the projects I completed last week.
To start, our entryway use to look like this:
YIKES!!!!!
Don't mind the shine to those doors...I had just finished painting them when this photo was taken and the paint hadn't dried yet. Ha!
I changed out the light fixture and added a mirror that I found at the thrift store and painted in this pretty green color.
Here is what I did.
I took down our old light and purchased one on clearance at Target for a really inexpensive price.
I had some green spray paint that I wanted to use and painted the light shade (it was purple and blue damask before- not my style).
I was going to leave the shade just plain green, but I felt it needed something else.
I cut out two triangle shapes using some cardboard we had from a cereal box and traced onto the shade.
I didn't really take my time on this...I needed it done quickly, but I actually like how it turned out!
I hung some crystals from the shade (they were a gift from my mom last year) and put it up!
LOVE!
I love how it looks with our mirror too!
It's bold and beautiful!!
And I think the green pairs nicely with our gray doors.
That's one of the quick projects I wanted to share with you all...there will be more next week.
As always, thanks for stopping by!
Hello!
Happy Monday!
So my title may sound familiar to some of you that have been reading my blog because I have blogged about this piece before.
Ya, I know! Already....I changed the paint color on our thrifted vintage dresser.
Why?
Well, I want to sell it in the future so I painted it a medium to light gray color and added some molding to the bottom that I painted as well to make it more universal for most places. A few months ago I posted a dresser for sale on Craigslist and it sold pretty quickly. I really like taking older pieces from thrift stores and giving them new life a new look so they can be sold....and then I can do it all over again. :)
Here is how the vintage dresser looks now as it sits beautifully near our entryway.
The knobs are original and I love them so!
They work so beautifully with the gray paint color.
To read more about the $9.00 thrift store chair, click here.
To read more about how to make a DIY canvas print, click here.
More to come this week!
Thanks for stopping by!
Linking up with: