Friday, January 20, 2012

Clipboard Art

Today, I said I would post about my clipboard art that was placed on some empty wall space in the guest room and that is just what I am going to do.  :)

To review, yesterday's post explained how to make fabulous clipboard art. What is so great about it is it is quick and inexpensive to do. You can use ANY fabric you want to wrap around the clipboards, and if you really feel up to it, you could dress up the clipboards with ribbon, too. I chose not to do this for my wall art because it will be diplayed in the guest room and I wanted simple lines and simple fabric to match the room.

Are you ready for some pictures? Here we go!!


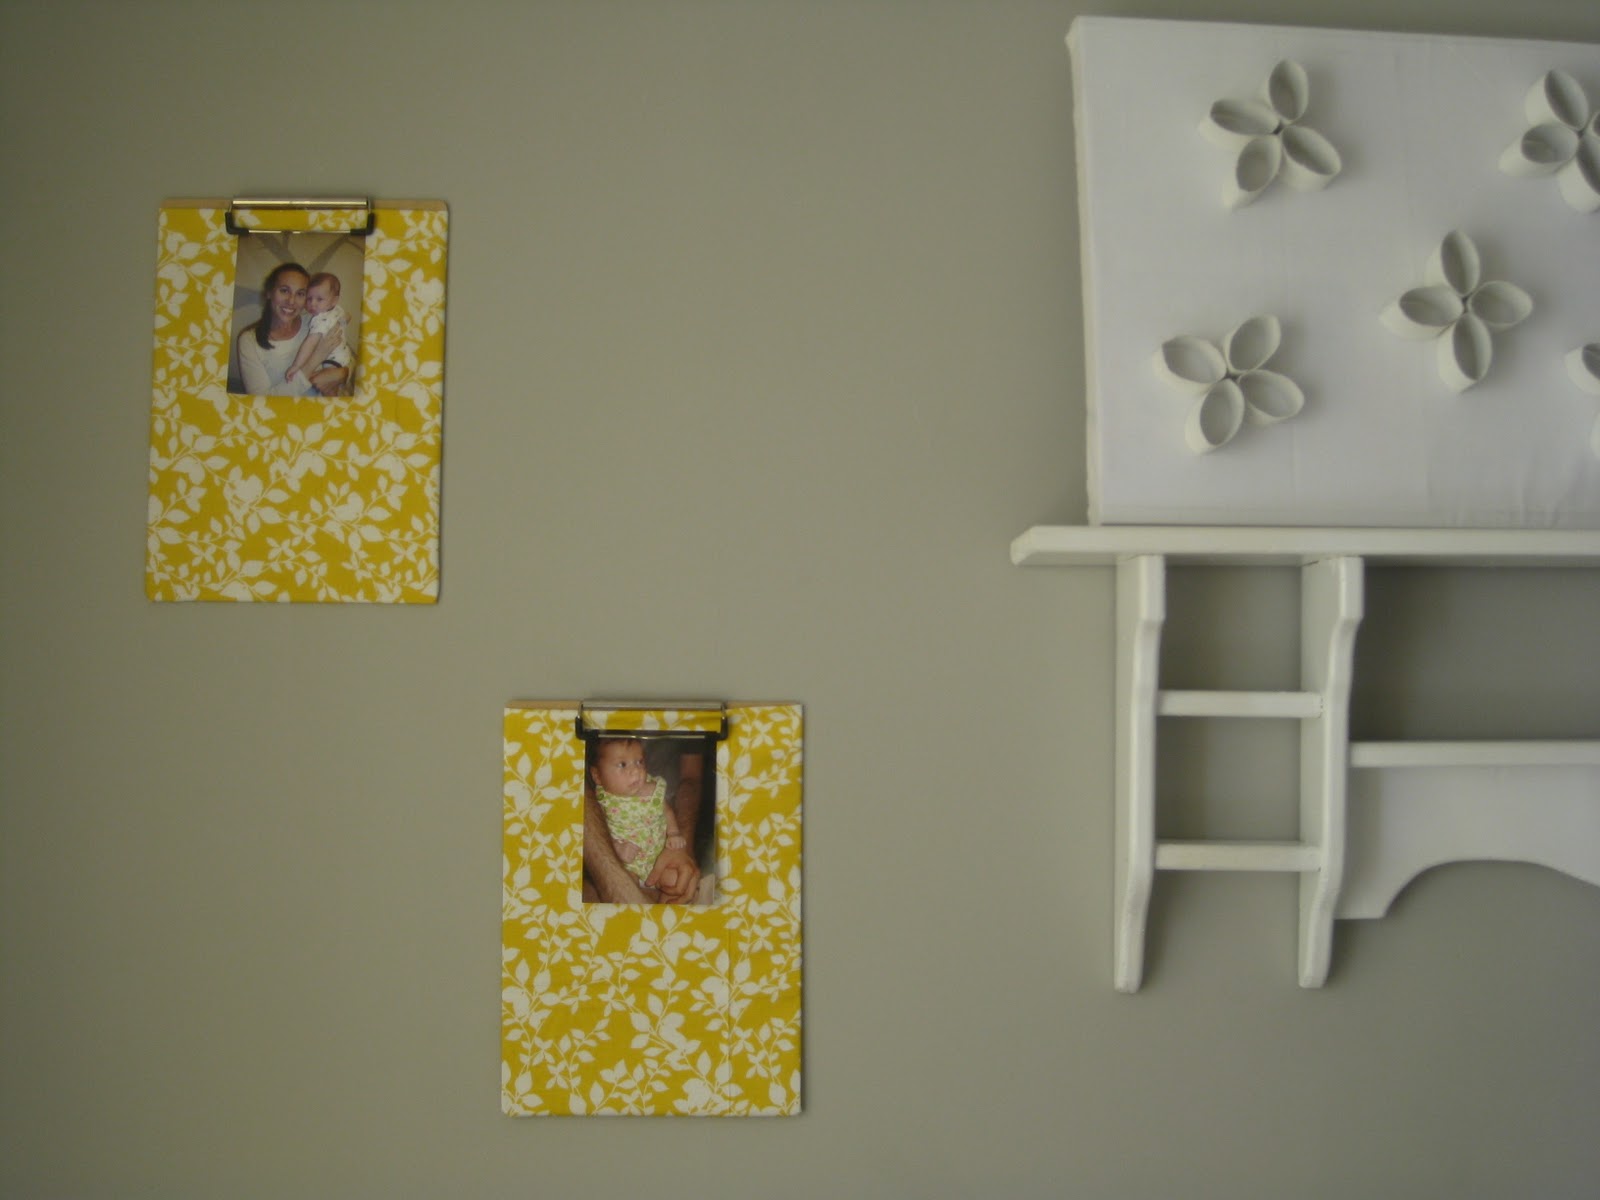
So here is what the finished product looks like (above). To utilize these clipboards, I placed pictures on the clipboards which was so easy and such a good idea to do because it holds great memories. You can replace the pictures with anything you like. Just think, you could display a favorite magazine article, your favorite recipes, parts of a novel, etc. And these would look great in a kitchen, too, for holding a recipe that you want to cook for the family....at least I think it would be a fabulous idea! :)


Remember yesterday I was heading out to Target with my little one to pick up some Command strips? Well, we got them and they did the job just fine.


Then I took a tape measurer and figured out where I wanted the clipboards to be hung on the wall. Both sides needed to look exact, so I measured a few times to make sure they would look identical on either side of the wall shelf.


Next, it was time to place the Command strips to the back of the clipboard. I used 3 Command strips for each clipboard. The strips came in a package of 12, which was perfect because I had 4 clipboards to place on the wall, and, if you do the math, using 3 on the back of each clipboard worked well.  :)  Even better, they only cost about $2.24 for each package and I bought two packages just in case I need more for another project. You never know! :)


Here are some pictures of what the clipboards look like in the room to the left of the wall shelf.


And here is another picutre of the clipboard art to the right of the wall shelf. This is what our guests would see when they first walk into the room.

Again, I will probably switch out the photos every now and then to give it some variety, but for now, these work well.


I will post either next week or the week after about the guest room makeover. I can also do a breakdown of costs for the items that we bought for the room and show more pictures.

Until them, happy Friday everyone!!

Thanks for stopping by!

Thursday, January 19, 2012

Two for One

Now that my little one is napping, I have time to make a quick post about two things I am working on right now. One is the nursery closet and the second is a clipboard made of fabric that will become wall art. It is going to be fabulous!


So I have been reading about a ton of different ways you can organize a kid's closet, or any closet for that matter, and I thought I would give it a try. Well, I haven't done it yet, but I wanted to post some before pictures of the closet so that when it is complete, I have before and after pictures for you to look at to get the same look if you so choose. Let's start with what the closet looks like today and what it has looked like since we moved in to our home.


So it is kind of an organized mess right now. It doesn't look that bad, really, but we need more storage in the closet because it is the smallest closet in the house and I have a plan.

What I was thinking of doing is adding a second clothing rod under the one that is already in place. Now, I don't know if I will remove the rod that is already there and move it up a little bit more to maximize storage so we can fit a second clothing rack below it, but either way, I would like to fit 2 of them in her closet. I would also like to keep the pink laundry basket on the bottom of the closet and maybe add some storage bins to the left of the laundry basket. These bins would hold toys, a tummy time mat, diaper supplies, etc.

I had also thought about turning the closet into a reading nook, but after talking with my husband about that, we figured it would be best to make the guest room closet a reading nook since that would be a better use of space and the guest room closet has a little bit more room to do that. YAY! :) But that project might not happen for a month or two so I won't have any posts about that yet.

Now back to the nursery closet...here are some pictures I found on the internet that will help me get started with organizing this closet:


Closetmaid 1628 Economy 5-to-8-Foot Closet Organizer White

I love the second image from www.younghouselove.com!


And another picture from their little girls room. I love the idea of a bench storage in the closet. I think I could fit something like that into the closet along with a pretty laundry basket.
I have also seen so many people get rid of the closet doors in bedrooms and replace them with pretty fabric. Not sure we will do that in most of the bedrooms in our house...BUT, I am thinking about doing that in the guest room because I want to turn that closet into a reading nook/clothing storage space.

************************************************

Now on to today's crafty project!
This morning I was trying to figure out what to do with some empy wall space in the guest room. Many ideas were swarming through my head- like place fun pictures on the wall, put up wall art, make my own art, paintings, etc, etc. I finally decided on what to do with that empty wall space this morning. Here is what I came up with:

It all started with an empty wall space next to a white shelf in the guest room.
FYI- this wall shelf was painted white and cost only $4.00 from a nearby thrift store. Again, gotta LOVE thrifting!!!


Some clipboards I had from teaching in Florida and extra fabric I had on hand from a home-made pillow.


What you want to do next is line up the fabric with the clipboard and turn on the hot glue gun. I bought my glue gun at Home Depot for $4.00!!! It is a heavy duty one, but it does the job.


I slipped in a picture of our happy girl. Here she is hanging out with me while I make these quick and easy clipboards. Isn't she beautiful?! And soooo happy. :)

There you have it, folks! A beautiful clipboard ready for wall decoration and it only took about 15-20 minutes total. Even better, it was free since I had everything on hand!

I think this would be such a fun activity to do with little ones, but not as young as my little one. hehe! She will help me some day soon.


What I also love about this project is that you can use any fabric you choose and place the clipboards on the wall in a loft, kid's craft space, bedroom, or whatever! How cool is that?


Here is my baby in front of the yellow pillow I made- out of the same fabric I used to make the clipboards...see how this is coming together?
 The fabric is from JoAnn's. Love that place!! The pillow was made a few weeks ago so I don't have any pictures of it...sorry about that. Again, that was before I even thought about making my own DIY blog. :)


I will be posting pictures of the completed guest room sometime in the near future and tomorrow I should have a post about the clipboards on the wall.

Thank you for stopping by!

Wednesday, January 18, 2012

Nursery Part 1

So I am back for another post about my daughter's nursery. Yesterday night after I wrote my first blog post, I jotted down some notes of what I wanted to cover in today's blog. Some of the things that I knew I should address/post about are the following:

 *Where we bought the wall stickers
 *Pennants hanging over the curtains
 *Before pictures
 *Curtains
 *Furniture
 *Wall color and rug
 *Post more pictures

These are in no particular order, so I apologize in advance if this seems confusing.  :0

To begin, I will talk about where we bought the wall stickers for the nursery. So, right after we moved into our lovely home, I knew I wanted to go with a more gender neutral theme in the nursery even though we knew we were going to have a girl. The reason for this is I wanted the room to be boy/girl friendly because this room will always be the nursery in our home and if/when we have a second child, I would like to keep most of the theme the same, especially if we have a boy next. Hey...you never know!

The rooms in our house are not very big, but it works so perfectly for us since we didn't have much to move up with...well, except our car and a few big furniture pieces. But, you get the picture. And, after all, like all of our bedrooms, a persons room should be a place to rest and feel cozy.

Okay...back to the stickers on the wall. The hubs and I did some shopping for the nursery (and yes, my hubby came with me to help me pick some things out for the room...isn't he sweet?) and the first store we came upon was Kohl's--which happens to be a few minutes down the road from where we live....SCORE!! They were having an awesome sale on wall stickers, buy one get one 50% off, and I knew that I had to buy 2 different kinds of wall stickers. Since I wasn't exactly sure of the room color I was picking, I went ahead and bought some fun/cutesie animal stickers that you can just peel right off the wall if you don't need them anymore. I loved that idea and so we purchased them. Here is a picture of them in the nursery.


This picture shows a few animals that sit above the changing table. More on that piece later. :)

The clouds in the picture wrap all around the room and I ordered those online...I forget which company I bought them from, but you could Google "cloud wall stickers" and can find them.
Side note: Please ignore the books on the floor...hehe...I still am trying to figure out if I want to buy a bookshelf for them or build some wall shelves to place them on. What do you think? There use to be a bookshelf where the painted nightstand is (which was a Thrift Store find) but it was kinda falling apart and we knew we couldn't keep it in the room for long, so we moved it out of there. I bought some cute pink knobs at Lowe's and replaced to old knobs on the nightstand.


I think it turned out pretty fab, right? Nothing like repainting something and replacing a few things to make an item look brand new....and it cost WAY less than if I would have bought something like this new!!!! Score again! :) I love it in Tess' room, but again, I would like to do something about those picture books, so for now we will keep it in here and maybe move some things around so the books have a home instead of on the floor. :)


The next thing I wanted to talk about are the pennants hanging from the wall. Aren't they adorable??


Those pennants were personally made by some good lady friends back in Gainesville, Florida where I had my first baby shower. By the way, that was the BEST shower ever and it was a ton of fun! :)

Okay, moving on to one quick little thing. You may be wondering where all the BEFORE pictures are...well, I didn't take any because I didn't think I would actually start my own blog. But you can just imagine a small boxy white room with nothing in it and that is what it pretty much looked like before I got to decorating it. ;)

This leads me to the next topic I told you I would post about: And that is the curtain ordeal. Well, originally I had a yellow sheet up as a curtain to be a little thrifty and thought I could make my own out of a bedsheet we haven't used in years. That didn't work out so well. Ha! Then it was on to buying some fabric at JoAnn's and making some curtains for the nursery. It was a neat idea, but it just didn't look right in the room, mainly because the fabric I chose just didn't fit the theme and wall colors. Then an idea hit me late one night! "Take the white curtains that we had in the kitchen and move them upstairs to the nursery" and Voila! It worked!! I did some other rearranging around the house with our curtains, but can talk about all that later in another post at another time. (Man, so many things to write about!)


All the furniture in the room and the bedding were all gifts to us from fabulous family and friends. And I love hand-me-downs, so I couldn't pass up the Cocalo bedding and furnishings!! Thank you, Gainesville friends and family. :)

Now on to the wall color: my favorite part!
I wanted to go gender neutral friendly so I was off to Sherwin Williams to buy two paint colors. The bottom color in the room is Lime Ricky (a sort of lime green color) and the top color is Bubble (a light blue color). Both are made to resemble the grass and the sky, respectively. It looks pretty good and both colors look amazing on the wall. And you can't beat having a cozy rocker for those late night feedings...although we get a full night's sleep now that our baby girl is 6 1/2 months old. God is so good!!


I had the rug, pictured below, from my old classroom (yes, I forgot to mention I taught elementary school back in Florida....LOVED that job but I LOVVEE being a stay-at-home mommy too!) and it works perfectly in her room. The hubs even said, "Hey! That looks great! It goes with the room so perfectly." Thank you, hubby!


And there you have it, folks! This little room was turned fabulous for less and is gender neutral chic!
Thank you for stopping by!