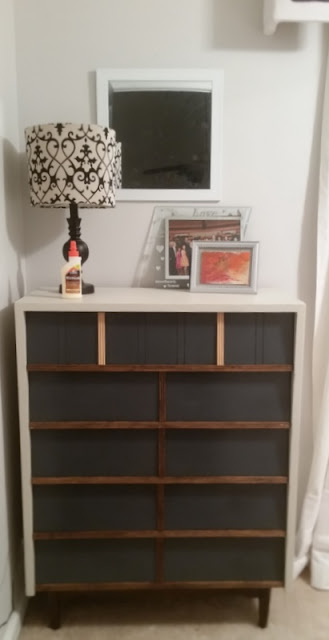
Sometime last year, I found a mid-century modern tall boy dresser at a local thrift store. Mid-century modern pieces are definitely not my choice of furniture, but we had guests coming into town and I wanted to find a dresser for them to place their clothes. Plus, the price tag was pretty sweet so we went ahead and bought it.
For the life of me, I can't seem to find any pictures of the dresser right after we bought it (they are somewhere!), but I do have some photos before I began this makeover on it. I really wanted to keep the original wood stain on the piece but it was not in great shape to begin with, so I went ahead and painted most of it except for the fronts of the drawers.
This dresser has been through a few different looks.
I first painted the dresser (minus the drawers), but then decided I really wasn't a fan of that look. So I decided to use another left over paint color to paint the front of the drawers and kept the sides and top in BM's Revere Pewter. After a few months of it being that way, I wanted to try one more time to update this dresser and help it look a little less mid-century and a little more our style.
So I bought some trim, stained it, and added it to the drawers. The sides of the dresser also got a new coat of paint to match the drawer fronts. Here are some photos of that process.
Measuring, cutting, staining, and adding the trim on the drawers. LOVE how it was beginning to turn out already!
Then I played around with different ways to arrange the trim on the top of the dresser. It already had these in-sets and I didn't really want to hide those.
I knew that after looking at different ways to arrange the trim to the top of the drawer, I was going to add the trim to the center of the drawer to keep it in-sync with the other 4 drawers below it.
The next step was painting the sides of the dresser. I decided to sand the top of the dresser to take the paint that was there off. I wanted to at least keep some of the original wood stain and this did the trick! There was enough left over trim to add to the front top of the dresser so that got added as well.
I loved it so much, that I wanted to move it to our son's room so we could see it on a regular basis. We secured the tall dresser to his wall to prevent it from tipping and moved the dresser that was originally in his room to the guest room. So now our guests still have plenty of space to place their clothes when they visit. Woohoo!!
It turned out much better than I anticipated, which thankfully ended up working out at the end even though there was no plan once I started this project!
Monday, August 14, 2017
Subscribe to:
Post Comments
(
Atom
)


No comments :
Post a Comment
I always love to hear from my readers! Thanks for taking the time to post an encouraging & uplifting comment.