Wednesday, December 25, 2013

Merry Christmas

Just wanted to pop in to say


By the way, have you all heard of this song by Hillsong?


If not, you should totally give it a listen. It's such and inspiring and uplifting song to our God and Creator. My daughter loves to listen to it. In fact, whenever we play it in the house or she hears it on the radio, she always says, "It's the Jesus God song!"
Oh it melts my heart to hear her sweet voice say that.
In fact, one day we were all on a drive around town and the beginning of the song came on and she said those words...so I quickly said, "No, baby, I don't think that's the song you are talking about."
AND GUESS WHAT?
IT SURE WAS!!!

Boy was I wrong and had to apologize...my hubby and I then praised her for noticing the song right away. :)

but Jesus said, “Let the little children come to me and do not hinder them, for to such belongs the kingdom of heaven.”
Matthew 19:14

May you all have a blessed Christmas and praise God for the wonderful things He has done!!

Monday, December 23, 2013

More Fun with Electrical Tape: The Buffet Table

So I have another quick project to share with you and it of course involves using electrical tape.

Did you know this stuff only costs $.69?!

Pretty cheap and easy to use.

I added it to our buffet table in a neat pattern. I've been wanting to do something like this before but wasn't sure what to use to create the pattern I wanted- that is, until I figured out I could use electrical tape to do it.
And it's not permanent so I can always take it off or change it if need be.


Once again, I just eyeballed everything and it worked well.


I did have to use some double-sided tape to keep some of the corners of the electrical tape on because they weren't sticking so well, but that seemed to do the trick!


Thanks for stopping by!

Thursday, December 19, 2013

Master Bedroom Update- Frames within a Frame

Hi there!
Hopefully my title makes some sense today!
If not, by the end of this post it will.

I recently added Dollar Tree wrapping paper to one of our walls in our bedroom and framed the border with some scrap wood that I painted white.
Inside my big DIY frame are some wedding photos of the hubby and I. ;)

Take a look!


After adding the wrapping paper to the wall (and using double-sided tape), I nailed the wooden pieces up around the paper to make it look like one large frame on the wall.
=)


It's not perfect, but it doesn't have to be.
That's how we operate around here people!


Now, I will say that I'm not IN LOVE with the paper choice, but it was the only thing I could find at the Dollar Tree that looked like something I would like and it was only $1.
Plus, I figure I love the frame part a lot so if I tire of the paper on the wall, I can just take it down.
Besides, it's only taped to the wall, not glued. ;) 


Have you used wrapping paper for other things besides wrapping gifts?


Thanks for stopping by!

Wednesday, December 18, 2013

Stairwell Photo Gallery- Wall

Well, now it is complete so I have some pictures to show you!

Let's get to it!


Also, I know the pictures are a bit dark, but I did take them at night.
However, you can still get the idea of what it looks like in the stairwell.


I really love how each picture tells a story.
Whenever our daughters go up the stairs to their playroom, they always stop and look at these pictures. Even our youngest does and it is the sweetest thing!


Now some of you guys may be thinking it looks a bit crowded (even though I may not agree!) but this is really the only gallery wall we have in the house. I took down our old one  and moved the pictures to the stairwell and love it so much better this way.


I hope you do too.


Thanks for stopping by!

Monday, December 16, 2013

Updating Our Shoe Storage

Hi!
Today I want to show you an quick update I made to our shoe storage.

Well, they weren't "beauties" at the time...so I primed and painted them and then added some hardware to them to make it easy to grab our shoes and such.

I came across this blog by Bethany recently and as I was searching through her recent posts, I saw a picture of her updated shoe storage and wanted to give it a try.

I used black electrical tape for mine and I'm not sure what she ended up using....for some reason I can't find that on her blog.

Anyways, here is what it looks like now...
Oh, and I just eyeballed everything to save time. :)


Thanks for stopping by!


Also, linking up here:
inspire-me-tuesday

Thursday, December 12, 2013

Making Changes in the Stairwell

I have a semi-quick project to share on the blog today folks!

A little bit ago, I moved our entryway gallery wall to the stairwell to keep most of the picture confined there. However, it seemed that added pictures to both sides of the stairwell wall was a bit much so it was time for a quick change.


See what I mean?!?


Oh, and I had to take a picture of my two little cuties playing together while I was snapping some pictures. :)


I used my handy left-over scrap wood again to make another picture frame and I went ahead and used the same that I used for this project.
I watered the stain down a little bit and that seemed to help with the darker color- it was a bit too dark originally, but now it's more of the shade I was looking for.


This was a picture I took a few years ago at the beach.
It looks great in black and white and I enlarged the print at Staples just like I did in this post!


The whole cost for the project was under $7.00  :)


In the meantime, I am working on moving the pictures to just one wall in the stairwell, that way we only have one gallery wall instead of 2 or 3.  ;)

At some point, I need to update my house tour- hoping to get working on that soon!

Hope everyone is staying warm this week!

Thanks for stopping by!

Monday, December 9, 2013

DIY Wood Stained Large Frame

Hello, hello!!
Did you all have a wonderful weekend?
It is soooo cold here right now and a little dreary out because of all the rain we have been getting. It sure feels like Christmas is almost here with the big change in weather though.

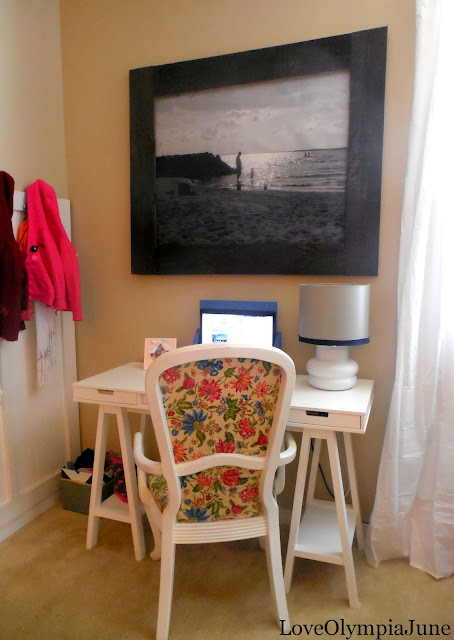
We recently put up a few Christmas things around the house and added a DIY wood frame to our entryway.


I recently sold our Thrift Store desk  and made a good profit from it. :)
In the meantime, I moved our white Target desk from upstairs down here so we have a place to put our computer and miscellaneous items.


To create our wooden picture frame, I used leftover wood from our outdoor shed project and nailed the large picture to the wood. Then I nailed the boards together with more leftover wood in the back in order to keep the whole piece sturdy and then I stained the whole thing.


I sanded the wood after staining to give it more of a weathered effect and it turned out pretty good.
 I do wish the stain was a little lighter in color- that was what I was hoping when I bought the stain color but it ended up being a bit darker than I was expecting.


Overall, I like that our picture frame was practically free- except for buying the wood stain at Home Depot.

I want to make one more of these to put in the stairwell eventually but I need to think of a neat picture to take before doing so.
The picture above is of my hubby and daughter at a nearby beach. I do love it so!!


Thanks for stopping by and have a great Monday!

Wednesday, December 4, 2013

Dining Room Rug

Good morning!

I hope everyone is having a good Wednesday so far.

I recently ordered a slate oriental rug for our dining room from RugsUSA because I actually loved the look and it was 70% off!
I actually surprised myself when I ordered it because it's not something I would normally go for but when I saw it online over the weekend, I couldn't help but think about it and wanting to buy it.

Thankfully the hubs liked it too and gave me the go ahead to purchase it.
It cost $70 and is a little over 5 feet by 7 feet- which is a GREAT price for a rug that size and for one of that kind as well.

Rugs USA Treasures I Persian Oriental Style ZG02 Slate Rug 
This is the one I ordered and I think it will look good with our furnishings.

I will post more about it once it gets here- which might not be until next week.


Thanks for stopping by!

Tuesday, December 3, 2013

The Beginnings of Christmas

Hi all!!

I wanted to get a post up yesterday, but I wasn't able to upload my photos into Picasa to edit...my hubby helped me figure out the problem and now that that is solved, I have a post to share with you this morning.

We put up our Christmas tree the day after Thanksgiving (a tradition in our home) and decorated a few things here and there. I don't usually go too crazy with decorations mainly because we would have no place to store everything if I did!

Here are a few pictures I took a few days ago.


 One of these days we will get a "real" tree, but for now, this little one will do. :)


I used the same blue and silver ornaments as last year  and still love that color combo!!


This year we added a new stocking since our family grew larger after having our second little girl! :)


I covered a few boxes, that would have gotten recycled otherwise, in wrapping paper and I actually love the look.
I normally don't go for red decor but the pattern on this paper was just my style and it works with the bookshelf.

Have you started decorating for the holidays yet?


Thanks for stopping by!