Showing posts with label Thrifting. Show all posts

Wednesday, October 5, 2016

How Hard is it to Decorate on a Budget?


When people come to our house, they are surprised to learn that most of the things we own come from a thrift store. They often sit down in a chair that came from a thrift store (don't worry, we made sure to clean it real good!) or eat at our kitchen table (which was purchased for a whopping $10) at, you guessed it, a thrift store. 
And since I'm a lover of paint and refurbishing things, that's pretty much the treatment that these thrifted items get. It's really amazing how you can transform something once you give it a little T.L.C.
We don't own a single new sofa, sitting chair, or coffee table, and we have bought many more items at these discount stores.


In fact, the only real "splurge" (if you will) we made years ago was on our bedroom furniture and dining table. We did this well before we had kids.  But now with 3 little ones and a dog (cause he counts too), we don't always have the funds to buy new everything. And I actually prefer it that way. It's given me ways to express my creativity and hunt for thrifty finds (even if there isn't much time for it these days).

If you are curious to try thrift shopping and want to know where to begin, here are some things to keep an eye out for:


1. Furniture- this includes items like dressers, tables, chairs, and even kitchen counter stools.


Dresser Turned Writing Desk


2. Clothes- this one is pretty obvious for most people. Just make sure to check it over before you purchase anything.

Not the best picture, but this is a $4 sweater. And it came from Target originally. Sometimes you just gotta look carefully (you might even find that some clothes still have tags on them!)


3. Mirrors- Lots of people like to give these away...but we've bought a handful of these over the years and painted them to replace some of the boring/generic ones that come in most bathrooms these days.


4. Pillows- I once bought 4 feathered down pillows. The total cost for all of them was about $10!! It's hard to beat that. Just recover them and you have new, comfortable pillows.


 5. Outdoor- Wicker/bamboo chairs (I painted some and put them on our porch), step stools (great for plant holders).


6. Miscellaneous items- Examples of this we have purchased include a wooden rocking horse, globe, wooden child rocking chairs, vases, candle stick holders, and frames. Love buying frames at the thrift store! Endless possibilities with those things and a lot of the times they are so cheap!


7. Lighting- As long as it works, you can use it! We have one hanging in our kitchen that we bought for about $5...just paint it if it doesn't go with your style!


Now I know some people wouldn't set foot in a thrift store because of some preconceived notions about them and that's fine. But if you're thinking about ways to save and have the time to browse and look around, you might be surprised at what you find.

And I should add that while we do a lot of shopping at thrift stores, we also give a fair amount away. I think that is important, especially if you are always adding more to your home. Having clutter is never a good situation!

So in the end, is it hard to decorate on a budget? I definitely don't think so...especially if you buy second-hand. :)


Monday, April 25, 2016

My Most Recent Thrift Store Find

Last week, I took the kiddos to Colonial Williamsburg for a bit to play, and since we were in the area, we stopped in at a few thrift stores afterwards. As it mostly seems to turn out, I was in there looking for a tall dresser to refinish, and instead found 2 little rocking chairs (which of course wasn't on my radar to find in the first place). The girls and I were instantly drawn to them, but we didn't leave right away with them. We ran a few more errands around town and decided to head back to the thrift store to get them after all. 
What makes it even better is that we only paid $15 for BOTH of the rocking chairs...so they were hard to pass up! 
And as an FYI- I never found the dresser I was originally looking for, but am still on the hunt for the right one. ;)

So here is how the rocking chairs looked after we bought them and brought them home.


They were very cute. Very.cute.indeed.


But, the original wood did not match the other, and I wasn't fond of the quilted coverings. I am keeping the covers just in case my girls want to use them, but I wanted the rocking chairs to match, so I took out some blue spray paint I had lying around in the garage somewhere and sprayed away.


After the chairs dried outside, it was time to bring them in to the girl's bedroom and see how they looked!


We found the perfect spot for both of them, right in front of the faux fireplace.
Now they have a place to put their dolls as opposed to keeping them in the bookshelf where they were hidden before. 


I'm also digging the bold blue paint on these rocking chairs. It adds some color to an otherwise very neutral and pink room. :)

Even thought it doesn't always happen, it's nice to find little surprises every now and then at the thrift store that can work in our home.

Tuesday, July 21, 2015

Our New Pillows


A bit recently, my family and I took a quick trip to JoAnn's to look at some fabric. Thankfully, they were having a pretty darn good sale on some of their fabric at the time, so I decided to go ahead and grab 4 different kinds of fabric by the yard and had each cut to the proper length needed to make some pillows. (yes, you heard that right...I said I was going to make some pillows with all the fabric I bought. Coming from someone who hasn't really ever sewed much in the past, this was a fun learning experience for me...but I must say that I really enjoyed it and while each pillow is not perfect, they came out pretty okay and I am glad I learned how to finally use my sewing machine- even if it took years to finally learn).
 
For the fabric, I decided to go with a mix of grays and greens to start with (no surprise) and added a little pop of color- pink- to the mix! I don't know if it's because our daughter's room is pink or what, but that color is starting to really grow on me more than it ever has before. And I also think it happens to pair wonderfully with our gray walls. I do, however, plan on adding some more pops of color in here and throughout the house at some point because having light gray walls can really make things a little dreary sometimes, but adding some little pops of color here and there shouldn't be too hard and it should do the trick.


I have to say that I am just learning to sew so if you look closely at these pillows, they aren't the best....but doing something like this on your own and learning as you go is pretty satisfying and in the end, they are just pillows. What I like is that if/when we tire of the color patterns (which will probably be a long while) they can easily be switched out.


And a lot of these photos were taken at night after the girls bedtime, so sorry for the poor lighting. :)


Some other fun facts:
These pillows were all purchased at one of my favorite thrift stores in Williamsburg. A good majority of them are feathered pillows and so I was surprised when I found them in the local thrift store there...I quickly snagged them up...didn't even think twice about it. They were all $7 and under....seriously?! 
Love it! 
I grabbed a total of 6 for this room and paid about $30 with tax for them all...including the 20x20 pillows. Sounds like a great deal to me! The other pillows that were originally in here were moved to our living room.
So if you ever want to pillow shop, I strongly suggest checking out a good thrift store nearby and looking at the selection. In the end, it doesn't matter what the pillows originally look like because if you are going to recover them it doesn't matter, so go ahead and give it a try!


Source list:

Wall color- SW Mindful Gray in Satin
Pillow covers- JoAnn fabrics
Rocking Horse- Goodwill
Globe- Goodwill
Water Pitcher on fireplace- Target
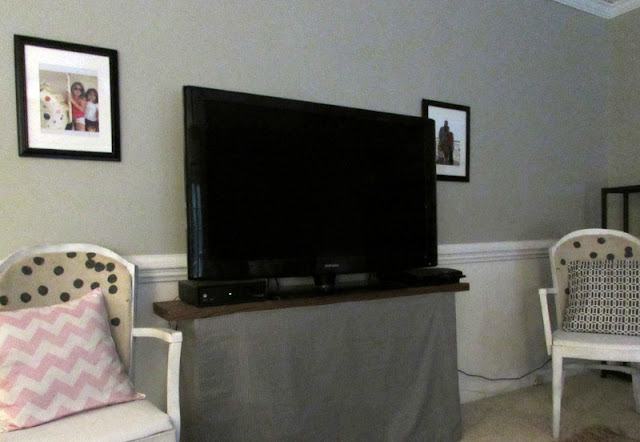
2 end chairs by TV- ReStore and recovered by me
Candlesticks on each side of fireplace- Goodwill
Blanket Storage Ladder- Hand built by us using left over wood from another project
Jute Rug- Ordered from RugsUSA
Metal storage unit by fireplace- Came with the house (was originally used in the garage but has since been cleaned and spray painted in oil-rubbed bronze)
Mason jars- Target
Large picture frames by TV- KMart


As you can see, we shop a lot at thrift stores, but we also mix our older items with new ones from other stores in our area. It makes for a unique collection of things and the hunt for some of these items is always fun- plus it is always fun to save a little money in the process. :) 


Thanks for stopping by and be sure to "Like" us on Facebook:
LoveOlympiaJune 

Monday, December 9, 2013

DIY Wood Stained Large Frame

Hello, hello!!
Did you all have a wonderful weekend?
It is soooo cold here right now and a little dreary out because of all the rain we have been getting. It sure feels like Christmas is almost here with the big change in weather though.

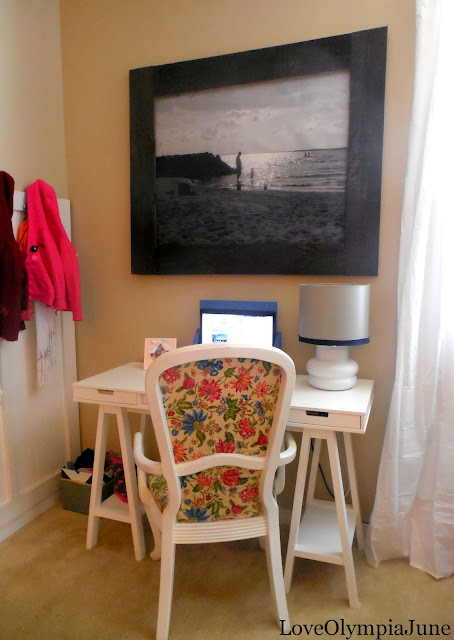
We recently put up a few Christmas things around the house and added a DIY wood frame to our entryway.


I recently sold our Thrift Store desk  and made a good profit from it. :)
In the meantime, I moved our white Target desk from upstairs down here so we have a place to put our computer and miscellaneous items.


To create our wooden picture frame, I used leftover wood from our outdoor shed project and nailed the large picture to the wood. Then I nailed the boards together with more leftover wood in the back in order to keep the whole piece sturdy and then I stained the whole thing.


I sanded the wood after staining to give it more of a weathered effect and it turned out pretty good.
 I do wish the stain was a little lighter in color- that was what I was hoping when I bought the stain color but it ended up being a bit darker than I was expecting.


Overall, I like that our picture frame was practically free- except for buying the wood stain at Home Depot.

I want to make one more of these to put in the stairwell eventually but I need to think of a neat picture to take before doing so.
The picture above is of my hubby and daughter at a nearby beach. I do love it so!!


Thanks for stopping by and have a great Monday!

Wednesday, October 24, 2012

Painting Armchairs!

Yep! You read my title correctly! :)
I painted our armchairs this weekend and have a few pictures to show you of the progress I made along the way.
I still have to upload more pictures of the family room as it stands with the newly painted armchairs, but that will be for tomorrow's post hopefully.
Let's begin, shall we?!
To start this project, I did a little research on exactly how you should go about painting a piece of furniture fabric like an armchair. There are many great resources out there, but the two that I used came from this lovely blog by Hyphen Interiors and this awesome blog by I Should Be Mopping the Floors.
So I went out and purchased some paint, a lovely color called Wrought Iron by Martha Stewart, a mixing container, a water bottle, and some Fabric Medium all from Home Depot. The total came in under $15.
I used 4 bottles of Fabric Medium...one note though: I could have probably used 3 bottles but I didn't water down the chairs the first go around like I should have so I needed the 4th bottle by the end.

Then I snapped some pictures of what one of the chairs looked like with the slipcover I made and the other chair without the slipcover.

Don't the original armchairs look fabulous?
Nope!! Not really...but it was $25 at the Restore and I knew I could do something with it...plus, we had been wanting 2 armchairs like these for our large family room and I couldn't pass up the $25 price tag!!!!!
:)
I love thrifting!!


Okay, so after I took off the slipcovers and cleaned up the armchairs a bit, I used my Home Depot water bottle to spray down the chairs.
I used a ton of water because you want to be generous with that part. I probably should have used more the first go around, like I mentioned before, but you live and you learn I guess.


Look at those lovely marks!
Anyways, this was a picture I took after the first coat went on.
I did 2 more coats after the first dried.


Then I came back after I let the paint dry to do a second coat on both of the chairs.
I watered down the chairs each time I painted.


Here is what she looks like after a 3rd coat of paint...doesn't look that great yet because the paint and the fabric medium had to dry first, but don't worry...I have more pictures to share with you tomorrow.


And a quick side-by-side shot of the armchairs from Before and After.

I should also mention that once these puppies dried, after 24-48 hours, they needed to be ironed a bit so the paint set...I still have yet to do that step because I just couldn't wait to get them inside to see how they looked in our family room. However, they were dry enough to sit in when I brought them inside....we already tested that out!!

And the chairs don't feel stiff from the paint either!
Why??
Because when you mix the fabric medium with the paint, the fabric medium keeps the paint on the chair from getting too stiff.
Amazing!!


Oh, and in case you were wondering, the blogs I read said to mix a 1:1 ratio of the paint and the fabric medium...plus, a half part of water before you begin painting.
I followed the directions on the fabric medium bottle and did about a 2:1 ratio of the paint and fabric medium with half the amount of water of the medium. For me, that worked best, but I don't think it matters too much. It may depend on the type of fabric you are painting.

Stay tuned for more pictures of the complete look and I will show you what these beauties look like in our room!!

I'd love to know if you have ever done something like this before too?!

The DedicatedHouse

Thanks for stopping by!


Family Room with Navy Armchairs

 
Hello all and good morning!
I hope you are having a great start to the day. :)
 
I am back to show you some pictures I took and uploaded of the new room we have been rearranging.
So many things have been added to this room...not necessarily purchased, but just moved around from other parts of our house.
It's kind of fun shopping around your house for things to put in other rooms...especially if they fit better in the new place you put them.
 
So here are some of the pictures I promised to share of our room!!
 
 
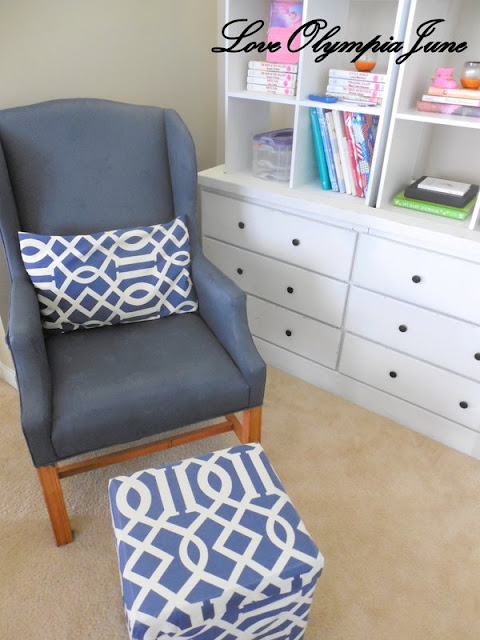
Here is one pictures of our navy armchairs...remember I shared about painting these here....


The blue fabric I bought online in the summer from Fabric.com and love how it looks paired with our navy armchair. :)

 
Here is the other navy armchair with a navy striped pillow I made out of fabric I also bought online at Fabric.com....great website to check out for a variety of fabric if you are interested.


I know...the TV needs to be cleaned again...I think what happened is I used a multi-purpose surface cleaner instead of the glass cleaner which was a big mistake...hehe. It can be fixed thankfully so I don't have to look at it like that. ;)
 
Anyways, do you love the new color combination we have going on?
 
 
Thanks for stopping by folks!


Monday, October 22, 2012

From Dresser to Bookshelves!

 
Happy Monday everyone!
I hope you had a great weekend.
My family and I spent most of the weekend hanging out together with friends, running errands and cleaning up the house. The last 2 don't sound that fun but it kind of was because I got to work on some more projects I had been thinking about. :) We invited some friends over so their son and our daughter could have a play date before bed time...then we, the adults, played some board games and munched on yummy snacks and desserts. We seriously would love to do that every week if we could!

Well, on to some of the DIY projects I completed this weekend...
 
To start, my husband and I hit up the local Thrift Store on Saturday with our daugther and found a beautiful piece of furniture for our dining room....sorry, no pics of that today but they will come, I promise! I just wanted to share that with you all because we moved our old table from the dining room to our family room and needed a buffet table...
 
Anyways, you might remember that I made over a dresser and used that as our buffet table in the dining room- check it out here! WELL.....I changed things up again...yep, once AGAIN, and had a new plan. This dresser has been changed around like 3 times already and each time I fall more in love with the transformation!
 
The plan was to move the dresser/buffet table to the family room and use it as a bookshelf (more on that soon) and put our new buffet table, which we purchased at the Thrift Store, into our dining room.
Our new buffet table really is a beautiful piece and I can't wait to upload the pictures of it to show on the blog.
Okay, so today I have pictures to share of how we paired our old buffet table with our Target bookshelves to make one big bookshelf piece for our family room.
 
To explain better, I have some pictures for ya.  :)
 
 
So here are the Target shelves in our family room by the fireplace.
For a week these stayed here until I could figure out what to do with them.

 
Then it hit me! I could use the old dresser we had in our dining room and move it to the family room.
Then, I put the Target shelves on top of our dresser and BOOM! we had the bookshelves I had been dreaming of. And we didn't have to buy anything to make them! We just shuffled some pieces we already had in our house around a bit.
And I guess I should clarify that my hubby helped with most of this because there was no way I was moving all of this stuff around by myself!  :)

 
Once I figured out that this was what I wanted, we started putting in the dresser shelves to complete the look a little more and I have to say that I love our new shelves!!!!!!
 
Like LOVE, LOVE them!!

 
I still have plans of placing a backing up on the back of the shelves and possibly paint that a navy color.
I am also working on a DIY project for our armchairs involving the color navy and will share that this week too!
 
You can see one of our armchairs in the picture above...and my plan for these armchairs involves paint (in the color navy) and removing the slipcovers. I am a little sad to see my hand-made slipcovers go, but I will keep them on hand just in case I want to use them again in the future. ;)

 
And we changed up the fireplace a little bit too.
With the birthday money I received from my parents, I decided to by a bronzed circular mirror I had been eyeing from Home Depot a few months back.

 
And here is a picture of the shelves and our new fireplace mirror together.  :)
 
So what do you think about the room coming together like this?
Do you love it as much as my family and I do?
 
Skip To My Lou
mop it up mondays MakeitPrettyMonday
  Home Stories A2ZMy Uncommon Slice of Suburbia
 
Have a great start to the week, everybody and thanks for stopping by!